Chapter introduction
Twenty minutes later, at Uther's encampment near the Blackrock clan village...
Mission Objectives
- Main Quest - Establish a Base
- Construct a Barracks.
- Construct 2 Farms.
- Train 6 Footmen.
- Main Quest - Blademaster
- Defeat the Blademaster.
- Optional Quest - Searinox
- Slay Searinox, the Black Dragon.
- Bring the Heart of Searinox to Feranor Steeltoe.
Summary
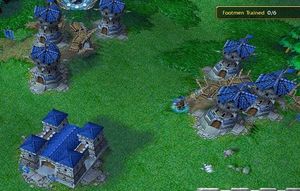
Start by building the base to complete the first Main Quest. Build more than two Farms, though, and build two Barracks, one near each entrance, and set the rally points to the entrances.
Have Arthas go east and start the Optional Quest with the Riflemen. Use him to heal the Riflemen as they take out the Dragons (Orb of Fire).
Gain a Wand of Negation by clearing some trees south of to the east of the dwarf, clearing a path along the eastern edge of that forest to a Gnoll Warden.
Clear out the Gnoll camps on either side of the map.
Take out the Murloc camp in the North-West (Claws of Attack +3), and clear the trees to the west to open up a passage to some Ogres in the corner of the map (Gauntlets of Ogre Strength +3).
Attack the Orc base in the North, starting by leveling the Barracks (use hit-and-run with Arthas' Divine Shield). After that, the Orcs are unable to produce anything but Raiders and your base is pretty safe.
Head North-East to take on the Blademaster.
Strategy
There are some good treasures to be gained in this level, so while it's possible to power through the Main Quests and take out the Blademaster without completing the Optional Quest or clearing the map of enemies, it's worth it for the long term campaign to fully explore the map and gain some items you'd miss otherwise. Some are very carefully hidden, so refer to this walkthrough or simply clear every tree in the level to find everything.
Start out in your base, and open up the crates to find a Scroll of Protection and a Potion of Healing.
Delaying the completion of the first Main Quest does not prevent Orcs from attacking your base, so you may as well complete that as quickly as you can.
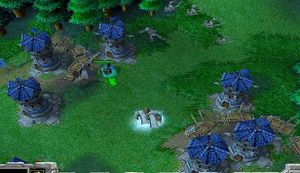
Create several Peasants to start with. Send four to gather lumber, train two to use as Tower builders and repairers (one at each entrance), and use another one to build your Farms and Barracks. Since the Town Hall is placed further from the Gold Mine than necessary, assign six or seven Peasants to it, rather than the usual five.
Build Scout Towers at the entrances and upgrade them to Guard Towers as quickly as your resources will allow (delay the construction of the Farms and Barracks to accommodate this). Build four at each entrance (for a total of six at each).
With your base fortified, you can start with the optional sections. You may complete the optional sections in any order, although you will at least want to obtain the four Riflemen from the Searinox quest. Your only requirement is to defeat the Blademaster, but you may miss out on a few items and may make the map harder if you don't have a good enough attack force.
As an alternative to building Towers in your base you can take Arthas and all of your combat troops to the clearing between your base and the Orc camps. Bring a Peasant and have him start constructing a six wide (east/west) and three deep (north/south) row of Towers. Make sure that you have enough resources to upgrade any Tower you build immediately. The Orcs don't have long-ranged siege weapons and will not be capable of getting through.
Searinox
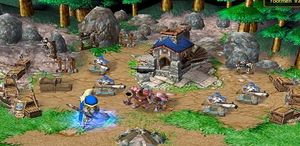
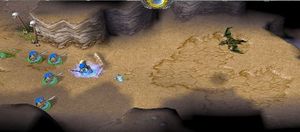
Send Arthas east (leave your Footmen and Uther to defend the base, along with the Towers), and he'll meet Feranor Steeltoe, who will ask him to complete the Optional Quest. This quest rewards you nicely, so it's worth doing. As soon as you obtain the quest, you will now be able to train Riflemen as well as gain control of the Blacksmith. Take the four Riflemen and continue east. You'll enter a cave. First you'll encounter a Black Dragon Whelp. The Riflemen will kill it pretty quickly. Arthas can't do anything to airborne units, but he's needed on this quest (plus just being near a kill will gain him experience points).
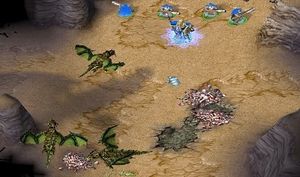
The path turns to the south, and there are three more Whelps. You'll take a bit more of a beating here, but focus your attacks on one at a time and use Arthas' Holy Light to keep the Riflemen alive.
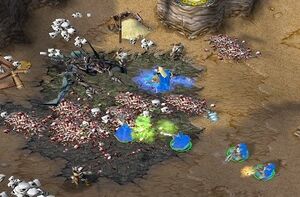
Finally, towards the west is Searinox, a black Dragon. Searinox is substantially more powerful than the Whelps, plus four Skeleton Archers will be raised once your attack begins. Set the Riflemen on Searinox, and use Arthas to take out the Skeletons and heal the Riflemen. You can use Holy Light on Undead units as an attack, but it's probably better to keep your men alive, as Arthas can't take out Searinox by himself.
Return the Heart, and you'll receive an Orb of Fire, which deals +5 fire damage to your attacks and also has a "splash" effect (meaning that other units not being attacked directly will take some damage.) If you haven't already, upgrade your units at the Blacksmith as resources allow.
Scattered creeps
Arthas can clear quite a bit of the map by himself, so leave your men at the base to defend it and let Arthas handle the rest. Of course, you can always send some men his way to help him out. Arthas, however, can go to the middle of the map to take out a Grunt and a Troll Headhunter there. Start with the Grunt, and the Troll will fall easily.
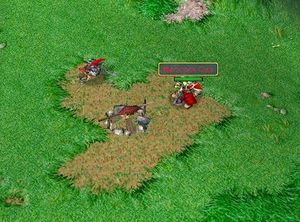
As Arthas romps around the map by himself, take a moment here and there between battles to rest and heal, or use potions to heal (and restore mana). It will be assumed that you will do this as necessary.
From the middle, head east and at the edge of the map will be a small Gnoll camp, consisting of one Gnoll and two Gnoll Poachers. Arthas can take them out in about four hits each. The Gnoll will drop a Potion of Healing, which may help speed up the recovery of this battle.
Then, head to the west side of the map, opposite the Gnoll camp, to find another Gnoll camp, this with two Gnolls and one Gnoll Poacher. You'll gain a Potion of Mana from the Gnoll Poacher.
Head north from the west Gnoll camp. You'll see some water, and two Murloc Tiderunners. These will fall easily, but make sure you are healed up before moving on (all of those Potions of Healing will be helpful). Continue north, into the water, and to the west. There is a Murloc village here, with four Tiderunners and one Huntsman. Go for the Huntsman first, and he'll drop Claws of Attack +3. Pick it up as soon as you can and then go for the remaining Murlocs. You might take a bit of a beating, but you don't stand much chance of dying. Start attacking the Huts, and the northernmost of them will reveal another Potion of Healing.
Hidden creeps
Send the lumber gathering Peasants east, and build a new Mill just west of Searinox' cave entrance. Have them gather lumber from the trees here, working their way south into the forest.
When the Peasants gathering lumber have cleared a path to a Gnoll Warden, set them up to start gathering lumber in the vicinity of the Gnoll camp in the east. Gather lumber to the east of the pond and heading north, and they'll reveal a ramp. Up the ramp are four Murloc Tiderunners and a Murloc Nightcrawler.
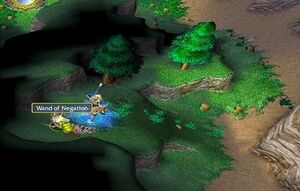
In the meantime, kill that Gnoll Warden. He'll drop a Wand of Negation, which can be helpful at the end of the level.
When the Peasants have cleared the ramp on the east side, bring them over to Murloc village and start the process again. Build the Mill as close to the water and as far west as you can, and start harvesting lumber up the ramp and plateau to the west of the Murloc village, and clearing a path to the north, revealing another ramp to the next plateau.
Once you can get Arthas up the second ramp, keep going north and you'll encounter an Ogre camp. These beasts will be tougher, but a good strategy is to attack the Ogre Magi first, and use Divine Shield when/if Arthas' hit points drop too low. That will buy you enough time to finish off the other two Ogre Warriors. The Ogre Magi will drop Gauntlets of Ogre Strength +3, which should earn a place in your inventory.
Orc Camp
You'll probably have leveled up by now. You have some options and there are any number of arguments for going with any of the choices, but this particular strategy recommends that you choose Divine Shield Level 2 now. You will use this in a few moments to help take out the Orc base.
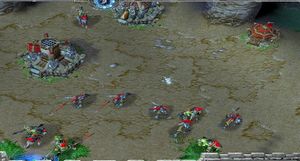
Now, in the middle of the North edge is the Orc base that keeps sending parties to attack your base. Without leaving your base defenseless, you can cut off the supply of Orcs with just Arthas. Position him in the middle, where the Grunt and Headhunter were earlier. You can send him in at any time, but you have a little luck after a party is sent to attack your base, and the Orc base has fewer units in it. When you're ready, send Arthas in to the camp, head a bit to the right and start attacking the Barracks (the building closest to the entrance is a Bestiary, which shouldn't be actively producing units unless you kill a Raider or play on hard difficulty. The Barracks will be producing Grunts and Headhunters that attack your base). Let the Orc units attack Arthas, but keep an eye on his hit points. You can pick your safety margin, but somewhere between 200 and 400 hit points (he should have around 800), cast Divine Shield (press "D"), and the Orcs will leave him alone. You can get in around nine hits and still have enough Shield to make a clean get away before the Orcs will start attacking again, so get Arthas back to your base. Let Uther heal him, and rest to heal the rest (if needed) and recover mana. Send him in again to continue attacking the Barracks until it falls. If you play it well, this can be done in three attacks. It might take four or even five, though. However, the advantages of this method is that saves you from creating more and more Footmen and Riflemen to take out the Orc base. If you didn't choose Divine Shield, though, that's what you have to do.
| Wave | Easy/Normal | Hard |
|---|---|---|
| 1 | 2 Grunts and 1 Troll Headhunter. | 2 Grunts and 2 Troll Headhunters. |
| 2 | 2 Grunts and 2 Troll Headhunters. | 2 Grunts and 3 Troll Headhunters. |
| 3 | 4 Grunts and 1 Troll Headhunter. | 4 Grunts, 1 Troll Headhunter and 2 Raiders. |
| 4 | 3 Grunts and 1 Troll Headhunter. | 3 Grunts and 3 Troll Headhunters. |
| 5, 8, ... | 1 Grunt and 4 Troll Headhunters. | 3 Grunts, 4 Troll Headhunters and 2 Raiders. |
| 6, 9, ... | 4 Grunts and 1 Troll Headhunter. | 5 Grunts and 2 Troll Headhunters. |
| 7, 10, ... | 2 Grunts and 3 Troll Headhunters. | 3 Grunts, 4 Troll Headhunters and 2 Raiders. |
Once the Barracks falls, the enemy will stop producing Grunts and Headhunters and therefore your base is secure, unless you play on hard difficulty. If you want, you can move your defense units to join Arthas, where they can level the entire Orc base. There are three Raiders who guard the town, and once one falls, the Bestiary will start producing more. Make the Raiders your first target (the third one might be blissfully unaware of the attack, sitting to the east), and then immediately set all units on the Bestiary. Usually you have enough time to take it out before a new Raider is produced. From here there are no more unit-producing structures, so have fun razing the base.
Blademaster
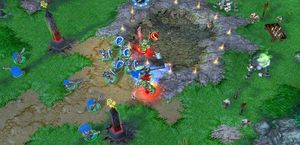
Now, the last bit of the level is to take out the Blademaster, who is in the North-East. He is guarded by a few Orcs, but nothing you can't handle with your party. There is a Raider and two Troll Headhunters, followed by two Grunts, and finally the Blademaster. The Grunts will probably be near enough to rush in when you attack the Raider and Trolls. Just focus on the Raider first and you'll be fine.
Now rush the Blademaster. He'll use Mirror Image, which will produce a "clone" of himself, making it hard to tell which Blademaster you should be attacking. The Mirror Image will not do any actual damage but will receive attacks as if it were the real thing. On hard difficulty, he'll produce three Mirror Images at once. The Wand of Negation can dispel this illusion and save you some time. Even without it, it's the Blademaster by himself, and with even a small party you overpower him on normal diffculty. On hard difficulty he'll also use Bladestorm, which can quickly decimate your party. The solution is to run your party away from the Blademaster as soon as it starts, and continue your attack once the Bladestorm's short duration is completed.
With the fall of the Blademaster, the level is won.
Treasures
- In your base, there are two crates with treasures: a Scroll of Protection and a Potion of Healing.
- Feranor will give you an Orb of Fire when you complete the Searinox quest.
- The hidden Gnoll Warden has a Wand of Negation.
- The hidden Ogre Magi carries Gauntlets of Ogre Strength +3.
- The Gnoll camp in the east will yield a Potion of Healing.
- The Gnoll camp in the west will yield a Potion of Mana.
- The Murloc Huntsman in the Murloc village in the North-West will drop a Claws of Attack +3.
- One of the Murloc Huts hides a Potion of Healing.
Points of Interest
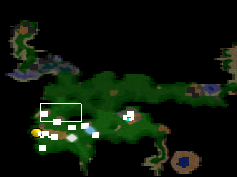
- There is a Gnoll Warden hidden in the forest in the south of the map, next to the cave.
- There is a group of Ogres in the North-West corner of the map, accessible from the Murloc camp.
- There are five Murlocs hiding behind trees directly east of the Blademaster's ritual pit. They may be reached east of the Gnoll camp.
- All three of these creatures require that you harvest or attack lumber to get to them. The easiest way to spot them is with the map reveal cheat. From there, you can determine the path you need to clear to reach them.